
Every Utah Valley skier who has spent a few winters at Sundance has looked across the canyon at an untracked slope and thought about it. The Wasatch is one of the best backcountry ranges on Earth, the trailheads are 30 minutes from Provo, the snow is famous, and the sport — skinning up a mountain under your own power and skiing down what nobody else has skied — is the best thing you can do on skis. It is also the most dangerous thing most people will ever do for fun, in a range that kills several people in a typical winter, and the deaths are not concentrated among beginners.
This guide is the first step, written for a competent resort skier or snowboarder in Utah Valley who wants to get into the backcountry and is asking the right question, which is not "where do I go" but "what do I do first." It covers the gear and what it costs, the free and paid training in the order to take it, how to use the Utah Avalanche Center's forecast, why uphilling inside a resort is the right first winter, the low-angle zones near Provo where people take first-timers and the hazards each one still has, the partner problem, and the way experienced people die here. It is not a substitute for a course. We have a longer avalanche safety guide that goes deeper on snowpack, terrain, and rescue; read that after this one and before your first tour.
First, the Honest Framing
Backcountry skiing has no ski patrol, no avalanche control, no groomed run, no lift, and no one coming. The mountain you skin up is the same mountain the resort blasts with explosives every morning before it opens, minus the explosives. The snow that makes the Wasatch famous — light, deep, frequent — is exactly the snow that builds avalanches, and the local snowpack has a particular habit of forming weak layers deep in the pack that persist for weeks and release without warning under a skier's weight.
The people who do this for decades are not lucky. They have a system: they read the forecast every morning, they carry and practice with rescue gear, they pick terrain that matches the day's danger, they turn around, and they ski with partners who will tell them no. The people who die are, disproportionately, people who had most of that system and skipped a piece of it once. The point of the training, the gear, and the habits below is to make the system automatic before you need it.
The Gear, in Order of Importance
The rescue kit. An avalanche transceiver — the beacon — is a radio you wear on your body under your jacket, switched to transmit; if you are buried, your partners switch theirs to search and follow the signal to you. A shovel with a metal blade and a collapsible handle digs you out; a plastic shovel breaks in avalanche debris, which sets like concrete. A probe — a collapsing pole at least 240 centimeters long — pinpoints you under the snow once the beacon has narrowed the search to a few square meters. Together, a modern three-antenna beacon, a metal shovel, and a probe run roughly $400 to $600 new, and the beacon is not the place to save money or buy used from a stranger. Every person in the group carries all three, always, on every tour, including the road above Aspen Grove. A group in which one person has the gear cannot rescue anyone.
The partner. Not gear, but it belongs here. A buried skier has about fifteen minutes before survival odds collapse, and the only people who can reach you in fifteen minutes are the ones standing there. Backcountry skiing alone is not a sport; it is a decision to have no rescue.
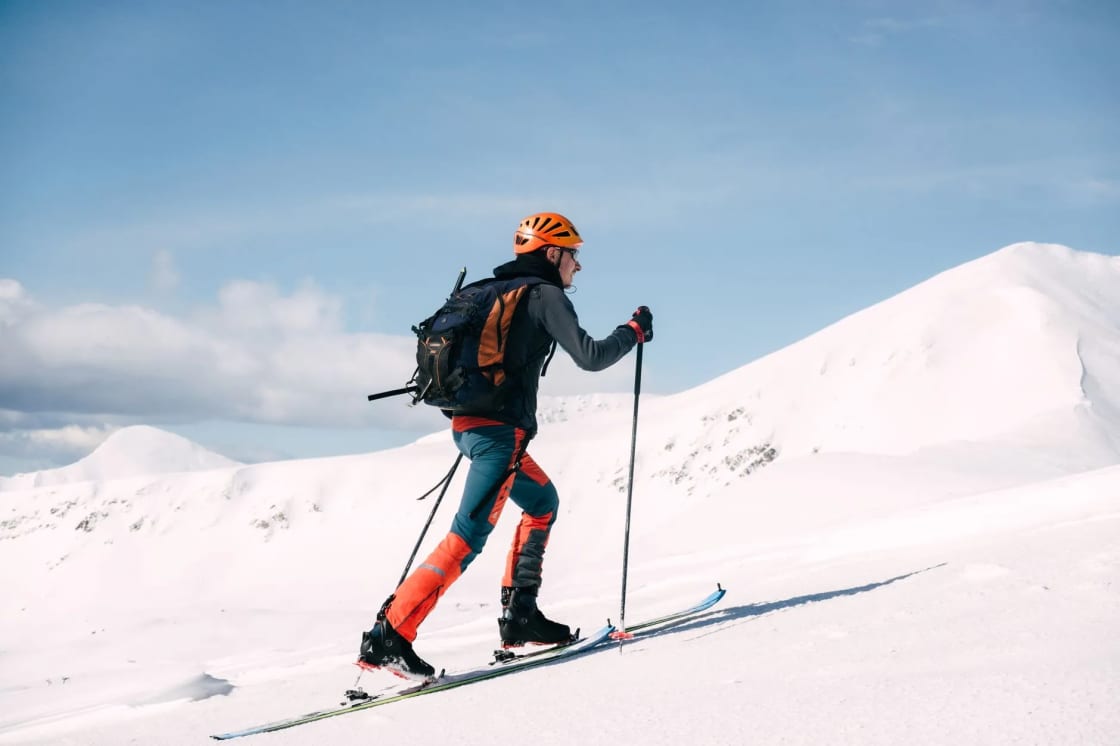
The touring setup. Skis with bindings that release the heel for climbing and lock it for descending; boots with a walk mode that lets the ankle flex on the climb; climbing skins, strips of fabric that stick to the ski base and grip the snow uphill; and poles with a wider basket. A splitboard is the snowboard version — a board that splits into two halves for climbing. A full new setup runs $1,500 to $3,000; a used one, from the fall ski swaps in Provo and Orem or the online boards where every Wasatch skier sells last year's gear, can be had for under $1,000; and several shops along the Wasatch Front rent touring setups by the day or the season, which is the right answer for the first winter. Ask the shop to set the bindings for your weight and ability, and learn to put skins on and take them off in your living room before you try it on a windy ridge with gloves.
The rest. A pack of 25 to 35 liters built to carry the shovel and probe inside and the skis outside. An airbag pack — one that inflates a balloon to keep you on top of the moving snow — is a real safety improvement and a $600-to-$1,200 one; most Wasatch regulars own one and most beginners do not need to yet. A helmet. Goggles and sunglasses, because you will sweat through the first and need the second at the top. Layers built for going uphill hot and downhill cold, which means a wicking base, a light shell for the climb, and a puffy for the top and the transitions. A first-aid kit, a headlamp, a repair kit for a binding, extra gloves, water, food. A phone with the maps downloaded and the UAC app, and — for anywhere out of cell range, which is most of it — a satellite messenger.
The tools of thought. A slope inclinometer, which is a $15 instrument that tells you the angle of the slope you are standing on, because almost everyone guesses low. A map app with slope-angle shading — CalTopo and Gaia both offer it — so you can plan a route that stays out of the 30-to-45-degree band and out from under it. A snow saw and a small notebook, later, when you learn to dig pits.
The Training, in Order
Know Before You Go. Free, one hour, created in Utah after a run of teenage avalanche deaths in the 2000s, and offered at schools, ski shops, and online through the UAC. It teaches five things: get the gear, get the training, get the forecast, get the picture, get out of harm's way. Take it first, this week, before anything else, and take it even if you decide the backcountry is not for you, because it is the education every resort skier who ever ducks a rope needs.
A companion rescue clinic. A single day, usually a morning, of beacon practice: burying a transmitting beacon in a field, searching for it against the clock, probing, digging, and doing it again with two burials. The UAC runs them, the Wasatch Backcountry Alliance runs them, the shops run them, and some are free. The skill decays fast, and the people who survive burials are dug out by partners who have practiced within the last year. Do this before your first tour and every fall after.
AIARE 1. The standard three-day recreational avalanche course in North America — classroom and field, covering how avalanches form, how to read the forecast, how to identify terrain, how to plan a trip, how to make decisions as a group, and how to rescue. It ends with a real tour that you plan. Providers along the Wasatch Front — guide services out of Salt Lake and Park City, the university outdoor programs, the UAC's own partners — have charged in the $500 to $700 range, and the January and February courses fill by early winter. Take it in your first season, before your first unsupervised tour, and treat the people in your class as your first partners. AIARE 2 comes later, after a season or two of tours, and is where you learn to dig and interpret snow pits yourself.
A guided day. Not training exactly, but the best money a beginner spends: a day with a certified guide in real terrain, watching how a professional reads a slope, chooses a skin track, and turns around. The Wasatch guide services run introductory backcountry days that include the gear.
The order matters. Gear without training is a false sense of security; training without practice fades; and a tour without either is what the fatality reports describe.
Reading the Utah Avalanche Center Forecast
The Utah Avalanche Center, a nonprofit working with the Forest Service, publishes a daily forecast for each mountain region of the state from roughly November through April, and one of those regions is the Provo mountains — the Wasatch from Provo Canyon south, including American Fork Canyon, the Timpanogos massif, Hobble Creek, and the Nebo range. It is free at utahavalanchecenter.org and in the UAC app, and it is the single most important thing you will read on any day you go out.
The forecast has a shape you will learn to scan in a minute. At the top is the danger rating — Low, Moderate, Considerable, High, or Extreme — shown on a rose diagram that breaks the rating out by elevation band (below treeline, near treeline, above) and by the direction the slope faces, because a north-facing slope at 10,000 feet and a south-facing slope at 7,000 feet are different planets in January. Below that are the day's avalanche problems, named and located: wind slab on the leeward sides of ridges, a persistent weak layer on the shady aspects, wet-snow avalanches on the sunny ones in the afternoon. Then the forecaster's discussion, which is where the real information is — what happened yesterday, what the weather is doing, what slid recently and where, and what the forecaster would and would not ski today. Then the observations, which are reports from the public and the professionals about what they saw.
Two things beginners get wrong. First, Moderate does not mean safe; most Utah fatalities happen on Moderate and Considerable days, because those are the days people go out. Second, the rating is for the region and the slope in front of you is specific; a Low rating does not make a 40-degree slope with a cornice above it a good idea. The forecast tells you which terrain to avoid; the decision to avoid it is yours.
Learn, too, what a persistent weak layer means here, because it is the local specialty. Utah's early season is often dry and cold, and a thin snowpack in November and December turns to sugar — faceted grains with no cohesion — under the temperature gradient. Then the storms come and bury it, and for weeks the whole winter's snow sits on a layer of sugar waiting for a trigger. The UAC names these layers when they exist and tracks them for the season; the discipline is to treat a named persistent weak layer as a reason to stay on low-angle terrain for as long as the forecaster says it is there, which can be months. Our avalanche safety guide covers the snowpack in more depth.
The Right First Winter: Uphilling Inside a Resort
Here is the advice most Wasatch backcountry skiers would give a beginner and most beginners do not want to hear: spend your first winter skinning inside a ski resort, and go to the backcountry in your second.
Uphill travel — skinning up a designated route on the resort and skiing down its groomed runs — is allowed at several Utah resorts, and it teaches everything except the avalanche part. You learn how the bindings work in walk mode, how to put skins on with cold hands, how to do a kick turn on a steep skin track, how to manage layers so you are not soaked at the top, how to transition from climbing to skiing without dropping a skin down the hill, and how much fitness the sport actually demands, which is a great deal. You do it on terrain that has been avalanche-controlled, on runs that are groomed, with ski patrol a radio call away and a lodge at the bottom, and you do it while you are taking the courses above.
The rules are the catch, and they change. Every resort that allows uphilling sets its own designated route, its own hours — usually early morning before the lifts open, sometimes evenings after they close — its own pass requirement, and its own conditions, and every resort closes uphill access without notice when patrol is doing control work or grooming. Sundance has published an uphill policy on its site; read the current season's version before your first morning, because a skier on the wrong run at the wrong hour is a hazard to the groomers and gets the route closed for everyone. Brighton and Solitude in Big Cottonwood have historically been the most uphill-friendly resorts in the Wasatch, with defined routes and, at Brighton, a pre-dawn crowd on the skin track most winter mornings. Our Sundance guide and skiing near Provo guide cover the resorts.
By the end of that winter you will have the fitness, the gear skills, an AIARE certificate, a set of partners from the course, and a season of reading the Provo forecast every morning. That is the point at which the backcountry is a reasonable next step.
The Zones Near Provo, and What Each One Still Has
There is no beginner backcountry zone. There is low-angle terrain in a low-danger forecast, and you assemble that combination each morning. With that said, these are the places Utah Valley skiers take first-timers, with the hazard each still carries.
The Alpine Loop road above Aspen Grove, Provo Canyon. The closed highway above the winter gate, described in our cross-country guide, is a road grade — under 30 degrees for miles — and the classic first skin in the county. It teaches the climb, the transitions, and the descent on a packed, wide surface. The hazard: the road crosses the runouts of slide paths off Timpanogos and the ridges to the north, especially approaching the summit, and the American Fork side beyond is serious terrain. On a Considerable day for the aspects the road crosses, it is not a road; it is the bottom of an avalanche path.
Big Springs and South Fork, Provo Canyon. The quiet side of the canyon, up the South Fork road past Vivian Park, has meadows and low-angle aspen benches that hold snow and see few people. The hazard: steep terrain above the meadows on both sides, and a drainage that funnels debris.
American Fork Canyon above Tibble Fork. The lower benches and aspen glades above the reservoir, on the closed road toward the Mineral Basin side, are gentle and popular. The hazard: the whole upper canyon is big avalanche terrain, the road is shared with snowmobiles, and the drainage is the runout for the north side of Timpanogos and the Alpine ridges. Our Tibble Fork guide and American Fork Canyon guide cover access and the winter gate.
The Uintas off the Mirror Lake Highway. About 90 minutes from Provo, the closed highway above Kamas and the low-angle glades off it have deeper, more continental, and often more stable snow than the Wasatch, at 8,000 to 10,000 feet, in terrain that is broadly gentler. The hazard: it is a different snowpack with its own persistent-layer problems, its own UAC forecast (the Uintas region, not Provo), colder temperatures, longer distances, no cell coverage, and snowmobiles.
The Cottonwoods. Salt Lake County's canyons are the center of Wasatch backcountry skiing and have the most beginner-appropriate terrain in the range, in the low-angle meadows and glades off the top of Big Cottonwood and along the Guardsman road. They also have the most people, the most complex access rules, and the two most heavily used backcountry corridors in Utah. They are the right place for a first guided day and a second-winter tour; they are 75 minutes from Provo.
What all five share is that the low-angle terrain is surrounded by steep terrain, and a slope does not have to be steep where you are standing to kill you. Terrain that is under 30 degrees but sits below a 38-degree bowl is not safe terrain; it is a target.
The Day Itself
A tour, once you have the training, has a shape. The night before: read the forecast, pick terrain that matches it, plan a route on the map that never crosses the slope angles and aspects the forecast flags, agree on a turnaround time, tell someone where you are going and when you will be back. The morning: read the forecast again, because it updates; check the weather; drive to the trailhead; do a beacon check in the parking lot — every person's beacon transmitting and searching, verified by every other person — before anyone clips in. The skin up: one at a time across anything exposed, spaced out, talking about what you see, digging a hand pit if something feels wrong. The top: transition where it is safe, not on the ridge in the wind. The descent: one skier at a time on any slope that could slide, from a safe spot to a safe spot, with everyone watching the skier and no one skiing until the previous person is out of the runout. The bottom: count heads. The car: file an observation with the UAC, which is how the next person's forecast gets written.
Partners, and the Word No
Backcountry skiing is a group sport in which the group is the safety system, and the most important quality in a partner is the willingness to say no to a slope everyone wants to ski. Find them through the courses — an AIARE class is designed to produce partners — and through the Wasatch Backcountry Alliance, the UAC's events, the BYU and UVU outdoor clubs, and the Utah County shops that run clinics. Vet them the way they should vet you: what course did you take, when, when did you last do a beacon drill, what would you do if the forecast changed. Be wary of online groups where strangers post tours, because the same board that connects you with a careful partner connects you with the person who has skied the Wasatch for twenty years and never taken a course.
And understand the human factors, because they are what the accident record is made of. The desire to ski the slope you drove two hours for. The confidence of a slope that has always held. The deference to the most experienced person in the group, who is also the most complacent. The commitment that builds once you have skinned up for three hours. The competition when another group is nearby. Every one of those has a name in the avalanche literature and a body count. The discipline is to make the terrain decision in the parking lot, from the forecast, and to treat the slope in front of you as a fact to verify rather than a reward to earn.
What It Costs, and What It Is Worth
A first winter, done right: the rescue kit, $400 to $600; a rented or used touring setup, $300 to $1,000; Know Before You Go, free; a rescue clinic, free to $100; AIARE 1, $500 to $700; a guided day, $200 to $400; an uphill pass at a resort, free to a modest fee. Call it $1,500 to $2,500 to be a competent, trained, equipped beginner by spring, which is roughly what a family spends on two Ikon passes.
What it buys is a version of the Wasatch that the lift skiers never see: a skin track through the aspens at dawn with nobody on it, a ridge at 10,000 feet with the whole valley below, a run of untracked snow that you climbed for, and the particular satisfaction of a day where every decision was yours and every one of them was right. It is the best thing you can do on skis. Do it in the order above, and do it for a long time.
Related Guides
- Avalanche Safety in Utah Valley: How to Read the Forecast and Stay Alive
- Cross-Country Skiing Near Provo
- Learning to Ski or Snowboard Near Provo
- Skiing Near Provo
- Sundance Resort Guide
- Tibble Fork Reservoir
- American Fork Canyon
- Snowmobiling Near Provo
Frequently Asked Questions
What gear do I need to start backcountry skiing?
What is the Utah Avalanche Center and how do I use it?
What is the difference between Know Before You Go and an AIARE 1 course?
Can I practice uphilling inside a ski resort?
Where are the beginner backcountry zones near Provo?
How steep is too steep?
How do I find backcountry partners in Utah Valley?
What is the most common way experienced skiers die in Utah avalanches?